

This is one of those things that drove me batty until I figured a way to fix it.
Scrivener is amazing, even with its limitations. (Still waiting on Scrivener 3 for Windows… *sob*)
Screenshots are for Scrivener 1 on Windows.
When compiling your document you can specify what you’d like to happen to separate two text documents. In Scrivener it’ll look like this. Your Manuscript folder contains a Chapter folder, and several text documents. You can see that hierarchy in the Binder on the left, and on the right the dashed line is how a break between documents looks in Scrivenings mode.

(Yes, I changed my default background color to green. It’s soothing, less harsh on the eyes.)
When you compile to a Word doc using the default settings it comes out like this:
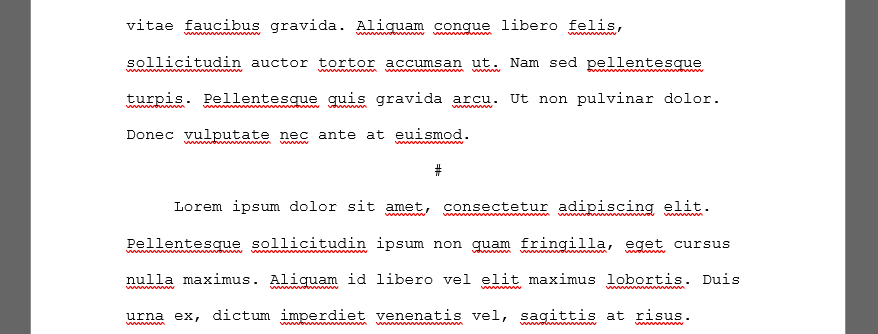
The hash sign separates the two text sections, but it’s not very visually distinct. It’s cramped. I find it easy to skim through a document and miss the break.
I want something like this:
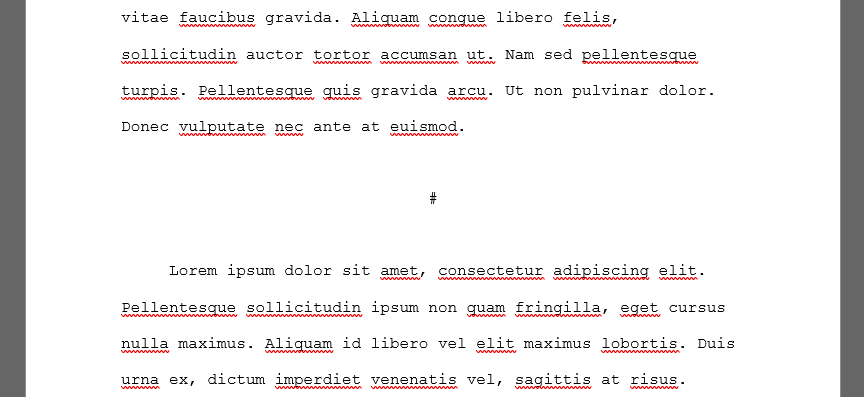
There, now that’s a clear distinction!
So, how do I make Scrivener do this for me automatically? With a little cheating.
In the Compile dialog, click on the Formatting tab.

On the right, select one of the folder levels under Type.
Click on the sample text that says “CHAPTER ONE”, then click the Section Layout button.
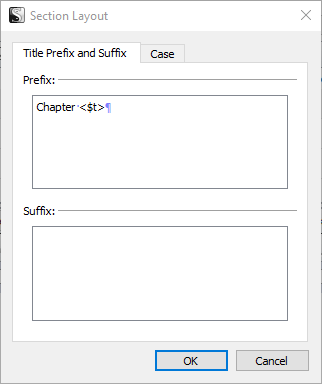
The next window that opens allows you to customize the chapter title. By default, the format is to say “CHAPTER NUMBER” followed by a line break and then the title of the chapter. The line break is marked by that blue-purple reverse P icon. That’s what we want!
Highlight just the reverse-P icon (more accurately called a pilcrow) and copy it.
Cancel out of the Section Layout box.
Now we’re going to move from the Formatting tab to the Separators tab.
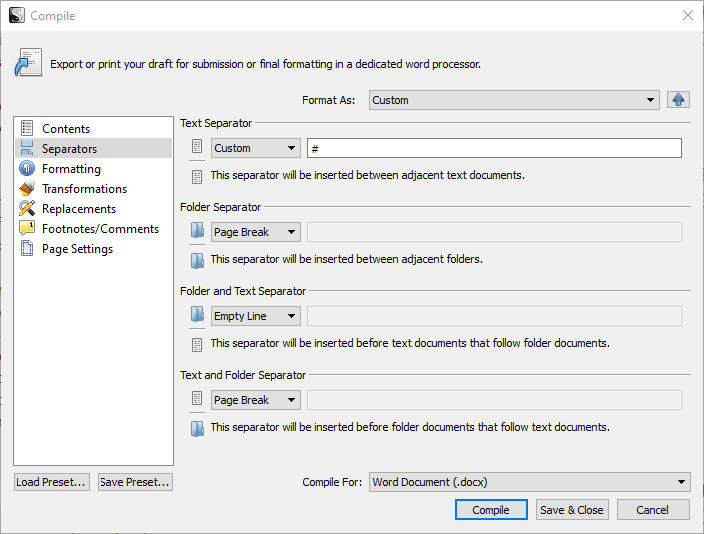
By default the Text Separator is set to Custom, and the only thing in that box is the hash symbol.
Paste the pilcrow you copied both before and after the hash. They’ll be invisible in this box, and act like a space, but they’re there!
Now when you Compile you’ll get one line of spacing before and after the hash!
The more times you paste the pilcrow, the more line breaks you’ll get. You can also replace the hash with asterisks, or other common symbols. Unfortunately, there are limits to which symbols Scrivener will accept here. Experiment!
I do this formatting trick each time I set up a new Scrivener file, and I find it a lot easier to read and analyze the resulting documents.
(One day a professional manuscript formatter may yell at me for doing this, but nyah.)
What’s your favorite little-known Scrivener trick?